Pages

Friday, April 29, 2011

Crock-pot Chicken


So, you will have to forgive me. I know this doesn't look like the most appetizing dish, but trust me, it is. It's also incredibly easy, which in my opinion makes it even more delicious!

All you need is:

4 chicken breasts
1 package of Italian dressing
1/2 cup of water

1. Mix it all together in a crock pot and let it slow cook for at least 4 hours.
2. After it's done cooking, take the chicken out and shred it. You can do this however you want, but I think it's easiest just to use two forks and pull apart like so:


3. Drain excess water in crock pot.
4. Add the following:

1 can of cream of chicken soup {I only add 1/2 can of water}
8 oz. (1 block) of cream cheese

5. Let sit while sirring occasionally for 30-45 minutes until the cream cheese is completely melted.

Serve over rice with your favorite veggies and voila, dinner is served!

-Sarah

Almond Cookies

I absolutely LOVE these cookies!
Check them out HERE
MmmMmm!


Enjoy!
-Nikki

Yummy Sugar Cookies

new recipe here
I made these for Arika's movie-themed birthday party!
They were really yummy :)


Enjoy!
-Nikki

Wednesday, April 27, 2011

72 hour kits

Derek and I officially completed our 3 month food storage supply.
As I was finishing up labeling everything, our 72 hour kits crossed my mind.
Im pretty sure we made them when we were first married, and have only updated them once in over 3 years.  Yuck.
I pulled those out today and went through them.  All our food had most definitely expired and they needed to be updated.  So once Derek got off work, I had my list in hand and we were off to go grocery shopping.


Here is what is in ours.  You can adjust to fit your family's needs or likes, but this at least gives you an idea of what to get.

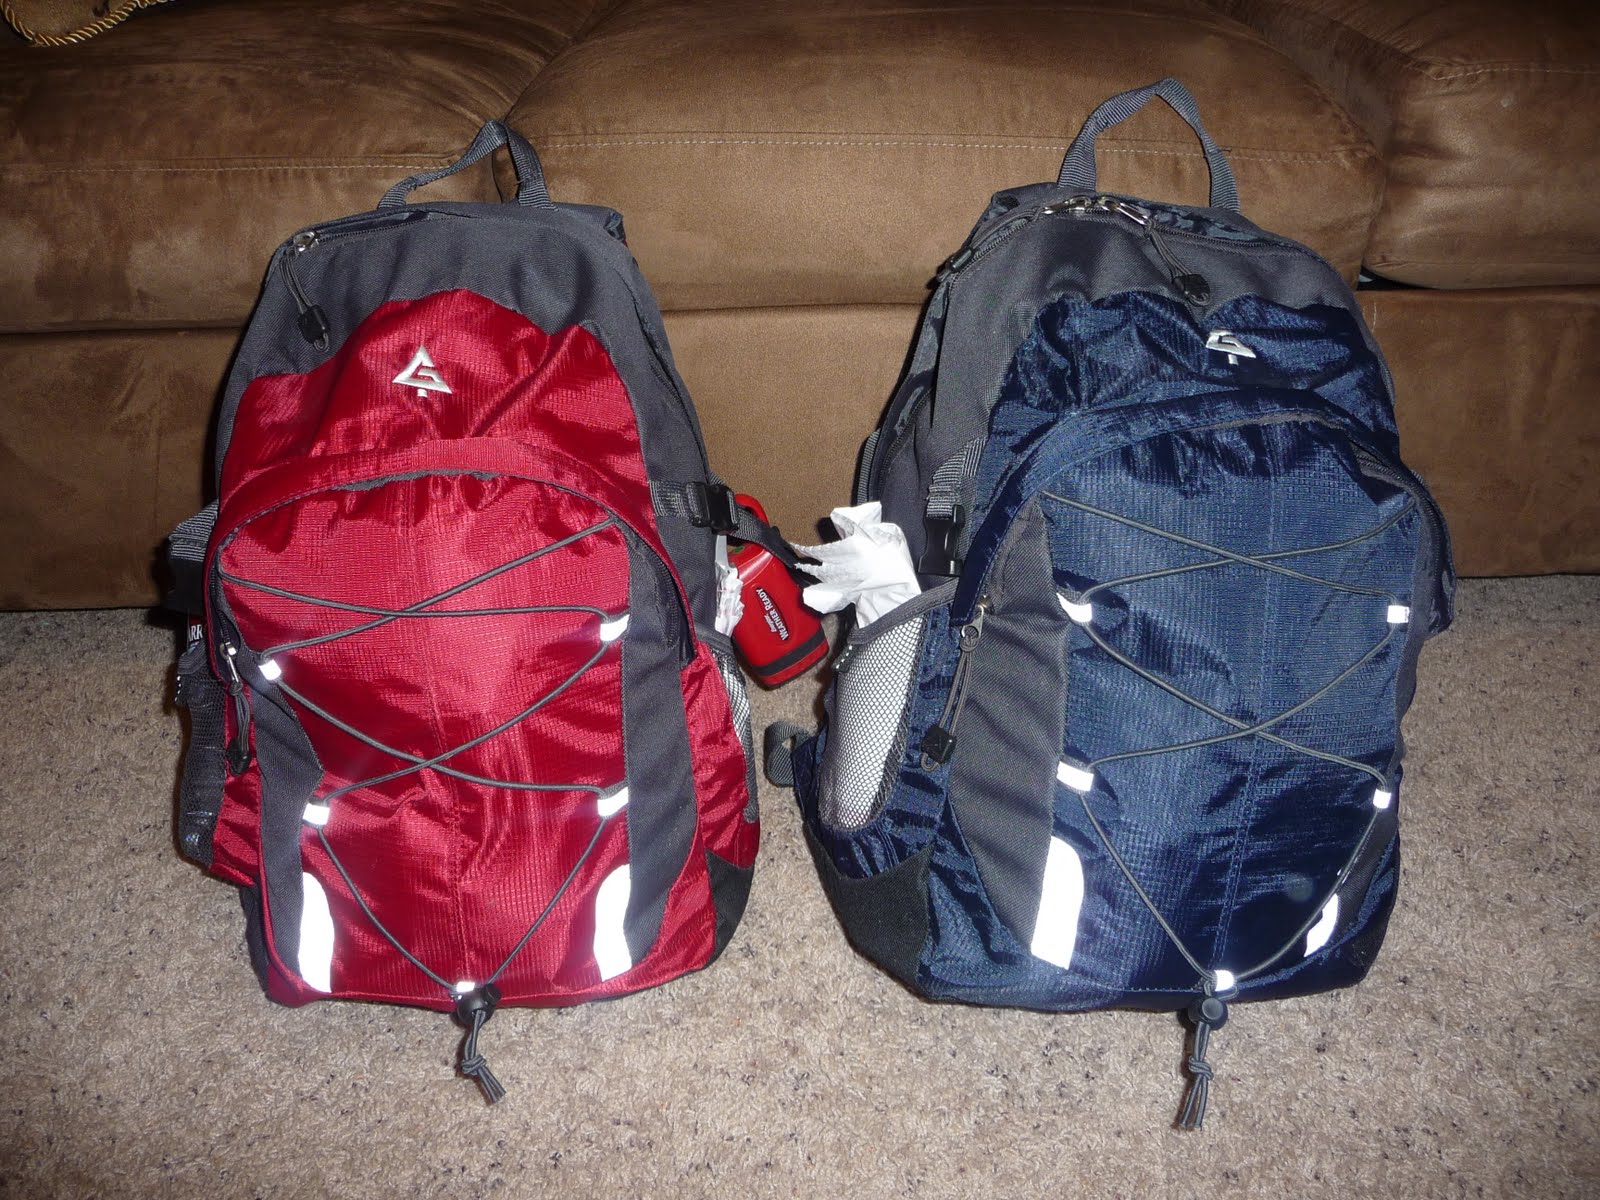
1 sturdy backpack per person (or rolling suitcase), or some tupperware bins (preferably with wheels). You pretty much need something that you will be able to grab at a moment's notice and throw into the back of the car


1 change of clothes per person

1 set of scriptures per family

1 flashlight per person

batteries (I put 4 batteries per bag)

small first aid kit:
  • bandaids
  • medicine (I put Ibuprofen in Derek's, Tylenol in mine just in case I'm prego at the time, and infant advil for my kids)
  • sanitizing wipes
  • disinfectant
  • gauze
  • neosporin
  • ace bandage
personal documents (copies of birth certs, ss cards, wills, patriarchal blessings, insurance card copies, etc). It's also good to have copies of these to send to a family member who doesn't live in your same area

2 gallons water per person  (this is a MINIMUM.  3 gallons per person is ideal)  I could only fit 3-4 water bottles per back pack, but we have our 3 month supply of water in our garage ready for pick up.

$100 cash per family (make sure you have some change and small bills)

utility knife

battery powered radio and light  

small sewing kit 

Food
    here is an example of food to store in your kits.  Remember to rotate every 6 months!
    1 lb dried fruit or trail mix per person  
    1 pkg soda crackers AND graham crackers per person (there are 4 pkgs per box)
    2 liter bottle of orange juice or similar per person (we did 4 caprisuns per person) 
    4 granola bars per person 
    3 fruit snacks per person
    1 can meat per person
    1 can chili per person
    1 can beans per person
    3 packages oatmeal per person
    2 sticks beef jerky per person  
    1 pkg chewing gum per person  
    3 packets hot chocolate mix per person  
    2 instant soup packets per person  
    1 roll of toilet paper per person  
    1 package baby wipes for Avrie
    feminine needs  
    infant needs  
    1/2 lb dried milk per person
    hard candy / lollipops  

2 lighters 

hand warmers

prepare blankets or sleeping bags to be accessible at a moment's notice  

1 small toothbrush per person 

1 travel size of the following per person:
  • toothpaste
  • soap
  • shampoo/conditioner
  • sunscreen
  • lotion
  • deodorant
  • floss
  • tissue
silver foil emergency blankets (one per person)

mosquito repellent  

duct tape

scissors 

small entertainment (crayons, card games, etc) and paper/pencils  

work gloves (2 pair per family)  

mess kits or disposable plates/cups/bowls/utensils

sippy cup for Avrie

pet supplies  (not needed for our family, but something to think about if you have a pet)

candles, holders, matches  

aluminum foil

can opener  

disinfectant

garbage bags 

It is also good reminder to UPDATE your 72 hour kit EVERY 6 MONTHS.  Something I am going to be better at from here on out.  It is sad to waste food, or if crisis came, to not have good food on hand.  Also, keep a list of everything inside and their expiration dated inside each backpack, so the next time you update you know what to get and what to throw out.
Good Luck!
-Nikki

Tuesday, April 26, 2011

Giant Cupcake Base

I got a lot of compliments on Avrie's giant cupcake she had almost a year ago for her birthday.  I thought I would share my secret to my fun cupcake base


Everyone pretty much knows about this awesome giant cupcake mold pan from wilton...

Bake your cake according to the pan's directions.

Now comes the fun part that made my cupcake kind of unique.  i didn't like just the plain old cake for the base.  I tried fondant and it still didn't show the groves like I wanted it to.  SO I thought, why not use white chocolate?!

I really like the Kroger brand of white chocolate.  I like the taste and you get a lot of chocolate in the package.  Not to mention its cheaper than the candy melts.

I melted the white chocolate according to the packages directions then added the color food coloring I wanted, in my case, lime green.  I then painted the chocolate onto the base part of the cupcake pan.  I painted until I had it about 5 layers.  Once you get a nice thick coating of white chocolate, stick it in the freezer for 10-15 minutes to let it set.  It pulls out really nicely.

Once your cake is completely cooled, you trim the base to fit inside your shell.  The top will sit nicely on top of the shell.  Then frost the top however you would like!  I used a pink frosting and swirled it!

these giant cupcakes are seriously so cute!  For all the other party guests, I thought it would be fun to serve little cupcakes.


have fun!
-Nikki

The Best Snickerdoodles EVER!

While living in Alabama last month, my husband and I decided to invite some friends over for dinner. I wanted to make some kind of dessert and was scrounging around for recipe ideas. I decided that I wanted it to be something easy {having dinner guests is stressful enough, no point in making it harder for yourself} and I came across this recipe for the most delightful snickerdoodles in the world!

You will need:

2 and 3/4 cups flour
2 tsp. baking powder
1/2 tsp. salt
1 cup {2 sticks} unsalted butter, softened
1 and 1/2 cups sugar
2 large eggs

Also:

1 cup sugar
2 tsp. cinnamon

1. Preheat oven to 350 degrees Fahrenheit.
2. Sift together flour, baking powder, and salt; set aside.
3. Cream together butter and 1 and 1/2 cups sugar. If you are doing this by hand, cream them until pale and fluffy. If you are doing this with a mixer, about 3 minutes should do the trick. This is important, so that your cookies turn out full.
4. Mix in eggs.
5. Gradually mix in flour mixture.

1. Stir together cinnamon and sugar in a small bowl.
2. Shape dough into about 1 and 3/4 inch balls.
3. Roll balls in cinnamon sugar.
4. Space 3 inches apart on ungreased baking sheet.
5. Bake for 12-15 minutes.


They go FABULOUSLY with a large glass of milk.
Enjoy!

-Sarah

Car Seat Cover

I never had one of these for Avrie.
I see them everywhere and wanted to try and make one for the baby boy coming in just a few short weeks.
I LOVED the way it turned out!


this picture has the corner flipped so you can see the underside fabric


here's how to make one for yourself:

Materials needed:
  • 2 yards of coordinating fabric: 1 yard each (cotton is good for all season, flannel/ fleece/ minky is good for winter)
  • Thread
  • pins to hold fabric together
  • sewing machine
  • Any accessories you want to add (buttons, bows, flowers, trim, etc)

1.  cut a rectangle that is about 40 inches x 34 inches with rounded corners.  You can cut one piece of fabric first, and then use that one as a guide to cut the other.  That is what I did, but you can also lay the two fabrics on top of each other, printed sides facing inside towards each other.  I did mine with rounded corners, but you can leave it rectangle if you want.  To do rounded corners I grabbed a bowl and traced it on each of the corners.


Once you have both pieces of fabric cut identically, pin them together so they don't move.


I sewed a 3/8" seam allowance on mine.  Before you sew it up all the way, save about a 4 inch gap.  Pull the fabric through to turn it right side out.  Once you have it completely turned out, top stitch your opening to close it off.  After you finish stitching it up, iron it flat so that it is easier to sew.


Once it is ironed flat, stitch around the edges to give it a nicer look and to keep it in place.  I used a 3/8" seam allowance.


Now come the straps.  Some people like Velcro straps, I personally like tie straps.  Using the scraps of the underside fabric, I made my straps.  I cut (4) 3.5 inch by 42 inch strips and sewed them the same way I did the main part.  Sew around on 3 sides, leaving one short side open to turn the fabric.  Turn the strips right side out, and iron flat, as well as turning the open short side in.  Topstitch all the way around, closing the opening.  Do this to the remaining strap. Stitch around each strap to give it that finished look and to help keep it in place.


Next you’ll want to figure out where to place the straps.  Every car seat is different, so if you are making it for yourself, you might want to try to figure out the best place for the straps by draping the blanket over the seat and marking where the straps work the best.  I sewed min 19 inches down, 13 inches in on each side.  Sew them long ways to your car seat cover

and there you have it!  your carseat cover!


have fun!
-Nikki

Monday, April 25, 2011

Chicken-Fried Chops in the Slow Cooker

For our new visitors,
I have my own recipe blog located here.

In order to still keep that one updated I will post the actual recipes there, but still let people know at the Avon Bunch that there is a new recipe!
So go and check it out!


Enjoy!
-Nikki

Fabric Flowers #2

These were made for Sarah's wedding.
They are very simple to do!
We made them as wrist bands, but you can make them into pretty much whatever you want!


Here is a pretty good tutorial.
Have fun!
-Nikki

Sunday, April 24, 2011

Easter Cupcakes

Today, I decided to try and be creative by making some easter cupcakes! I saw the idea for these on our aunt's blog and fell in love with it.


I tweaked it a little bit though and here is how...These are the ingredients you will need:


My husband and i are trying harder to be healthy, so we went with a low calorie chocolate cupcake. here is the recipe:
  • 2 tbsp butter
  • 3/4 cup sugar
  • 1 egg
  • 1 egg white
  • 1/2 cup buttermilk
  • 1/3 cup water
  • 1 tbsp white vinegar
  • 1 tsp vanilla extract
  • 1 1/2 cup all-purpose flour
  • 1/4 cup baking cocoa
  • 1 tsp baking soda
  • 1/2 tsp salt
  • 1/3 cup miniature semisweet chocolate chips
1. Preheat oven to 375 degree Farenheit.
2. Soften your butter beforehand and cream it with the sugar in a large mixing bowl until it's a nice, light, fluffy mixture.
3. Next, add the egg and egg white separately and beat the mixture well. Use your own manpower or an electric beater to whip it all together.
4. Stir in the buttermilk, water, vinegar and vanilla.
5. Mix your dry ingredients together and then add it to your batter until it's moist.
6.  Finally, add in the secret ingredient -- chocolate chips.
7. Now fill your muffin tins 2/3 of the way full of batter.
8. Back for 15-18 minutes.

While you are letting them bake, this is where the fun begins. You will need:
  • Orange starbursts
  • Green Twizzlers
  • Kitchen skewers
  • Kitchen scissors
  • Green food coloring
  • Coconut
  • Green frosting
  • Baggies
1. Take an orange starburstt and roll it into the shape of a carrot. {you can microwave it for 5 seconds to soften it if necessary}
2. Use a skewer and make a hole about 1/4-inch deep in the top of each carrot.


3. Cut off about 1 inch of green Twizzler and then snip it in half vertically. Turn each half into a leafy top by cutting fringe in one end.


4. Insert the carrot tops into the holes in the carrots.


Your carrots are done!

In a baggie, put some coconut and a few drops of food coloring in it, depending on how green you want it to be. Shake it up. When your cupcakes are finished, let them cool. Spread the frosting on them and top with green coconut, to make it look like grass. Insert 2-3 carrots in a cupcake and enjoy your creation!


P.S. Happy Easter!
-Sarah

Friday, April 22, 2011

Finger Puppets

Come church time, Avrie is all about being loud and active.  I made these little guys for her church bag to help distract her and she loves them!  We also practice animal sounds with them. 


here's how:

Materials needed:
sissors
felt in all different color varities
small googly eyes
hot glue
sewing (optional, you can use hot glue instead)


1. You need to cut out two pieces of felt that are the same shape into a semi-oval shape. Make sure the semi-oval shape will fit over a child's finger.

2.Next, you will need to sew the two pieces of felt together around the curve of the semi-circle. Keep the stitches close together. **If your looking for a faster method and don't want to whip out your sewing machine, I just hot glued mine.  Do not sew or glue the bottom of the felt pieces, as this is where the child will insert his finger into the puppet.

3.  If you decided to sew your puppets, once you have sewn the puppet together, turn it inside out. This way you will not see the seams of the thread.

4. Add details to your puppet by using felt to cut out eyes, a nose, a mouth, buttons and other details. I used googly eyes for my puppets eyes and glued them on. Use strands of yarn for hair. Add these parts using tacky glue or a hot-glue gun, as regular glue will not work well to hold the pieces together.  Basically, you create your animals to look how you want them too!

have fun!
-Nikki

Thursday, April 21, 2011

Magnet Board

This was a fun project!
Similar to the wood block letters, this is a mod podge craft.


I went to my local craft store, aka Debbie's work, and picked up the cute wooden magnet board, some wooden cut outs to use for the magnets that I got for about 25 cents a piece, and scrapbook paper.  I picked out corresponding craft paper to the ones that matched avrie's nursery colors.  I got the magnets at hobby lobby, and had the rest of the embellishments on hand.

Once again, i just traced the shapes and the magnet board to the paper and followed basically the same instructions that I used for the wood block letters I mentioned earlier.

have fun!
-Nikki

Wednesday, April 20, 2011

Fabric Flowers

I LOVE making fabric flowers!  Mostly because they are so easy and cheap!  Avrie has bows and flowers coming out her ears.  And the fun thing about fabric flowers, is that you could totally make headbands for yourself as well!

Here is one type of fabric flower that is probably my favorite!


I got the tutorial from here.
They really are very cute and super inexpensive!

have fun!
-Nikki


baby girl tutu

, I absolutely LOVE all things girly.
And that can definitely be seen through my little girl.
When Avrie was first born, I knew I wanted to make her a tutu.  I got a lot of compliments on it and it was SUPER EASY to make!


Instead of typing up all the instructions, I will send to you to this site.

 It is definitely cheaper to make a tutu than to buy one. Mine cost me about 10-12 dollars.  For baby tutus you need to get about 1/2 yard of 1/2 inch wide elastic. You can measure it around her waist after you get it, but you wont need any more than that. You also need to get about 6 yards of tulle. If you decide you want 2 colors you need about 3 yards of each color.  For 3 colors, you will need about 2 yards of each color. Then you cut the tulle in strips 2 inches wide, and cut the length double what you want the final length to be because your going to be folding it in half. For example...I like Avrie's tutus about 7 inches in length so i cut the trips 14 inches long. Hope that helps!

Have fun!
-Nikki


baby taggie blanket

When Avrie was a baby, Derek's cousin made us this adorable taggie blanket for her.
She LOVED it!  Only problem, is this blanket was pink and my baby due in July is a boy.
I decided to teach myself how to make it, but in green this time for my boy.
For written instructions this tutorial is very helpful!


Have fun!
-Nikki-

Wooden Frames

This is a fun project that adds a lot to a blank wall.


heres how:

what you will need:

3 8x10 unfinished wooden frames (I got mine from hobby lobby when they were 30% off)
paint
distress ink
drill
ribbon
curtain rod

1. Drill two holes at the top of each frame the desired distance apart 
2. Paint your unfinished wood the desired color.
3.  After it drys and it is the amount of coats you want, use the distress ink pad to antique the edges
4. String your ribbon through to hang the length you want.  You will need six strands of ribbon the same length.  I did two different colors of ribbon.  A dark brown and a sheer pink.  If you want to do something similar, you will need 12 strands of ribbon the same length, six of each color.
5.  Hang curtain rod according to its directions
6.  Once rod is hung, tie your ribbon around the curtain rod to let pictures hang.

Have fun!
-Nikki

for my distress ink pad i use this stuff and swear by it!  It is AWESOME!

Wood Block Letters

When I was pregnant with my daughter I made these wooden block letters for her room.  I think with my boy, I am going to do them a little differently to hang on the walls but the idea is the same.  I LOVE them!  I think it adds a lot to the room, because you can add new patters, while still using the color scheme.


Here's how:

you will need:

block letters to spell name
scrap book paper for each letter
scissors
mod podge
a thick paint brush
sand paper
stain or paint
any embellishments you might want to add

1. Purchase a wooden alphabet block for each letter in child's name (letters can be purchased at craft stores, Wal-Mart, Target, etc.)

2. If the letter is not made out of stain-able wood, paint the letter using paint and a foam brush. Once dry, sand edges of letter using sand paper, if desired (for a vintage look).  I like to use stain.

3. Purchase scrapbook paper(s) of desired color and design (ideally mimic colors and theme of baby's nursery).

4. Purchase additional embellishments such as metal embellishments (brads, eyelets, spiral clips, etc.), coordinating ribbon, paper flowers, buttons, etc.

5. Place wooden letter on top of paper you'd like to cover the face of the letter with. Using a pencil, trace around the letter onto the paper. Cut the letter out of the paper just a little bit to the inside of the traced lines (so the paper doesn't hang over the wooden letter edge). Then place the paper letter on the top of the wooden letter. Make any trimming adjustments to the paper if necessary.

* Chalk the edges of the paper with a liquid chalk pad, if desired. (for a vintage look, use brown chalk).

6. Use Mod Podge or craft glue to cover the back of the paper letter with a thin layer of adhesive. Apply paper to wooden block and smooth out the paper.

7.  Optional.  Add a final coat of mod podge on top of the letters once they are dry and before any embellishments are added.  I just do it for a protective coat and to add texture.  But it is not needed.

8.  Add any desired embellishments.


Have fun!
-Nikki